How to Reduce Dust When Painting Your Car at Home
The Myths and the Magic of Controlling Dust in DIY Auto Painting
Links to products mentioned are below the write up
Click HERE to go to the product list
When you paint a car at home, one of the biggest challenges is figuring out how to reduce dust—and overspray. Whether you’re in a garage or a makeshift booth, controlling dust is key to getting clean, professional-looking results. This guide breaks down what actually works, based on real-world experience from seasoned DIYers and pros alike.
It’s a topic that comes up constantly in forums and Facebook groups—for good reason. And, there’s a lot of conflicting advice out there. Some of it’s helpful, some of it’s outdated, and some is just flat-out wrong.
This article pulls together the Best-Known Methods from hundreds of conversations with experienced painters—both pros and serious hobbyists—who have been there, done that, and are getting great results. And a special thanks to the group on the SPI Forum – the best source of paint/body information on the web.
We’ll start by busting some common myths, then dig into what actually works—the real “magic”—and why it matters.
I know some folks will disagree—rock on! I’m just sharing what’s worked for me.
A Quick Reality Check
Every single paint job has dust in it.
Even brand-new cars, painted by robots in multimillion-dollar booths, aren’t immune.
At SEMA 2023, I asked a rep from a major sandpaper company about the small rolls of finishing-grit discs (about 1.5 inches across) on their table. He told me they’re sold mainly to auto manufacturers like Honda, Toyota, and GM—because new cars average 25–30 dust nibs that have to be cut and buffed out. These are factory paint jobs in the most tightly controlled conditions possible—conditions no home setup can replicate.
That said, there are practical, affordable things you can do to dramatically reduce dust and get exceptional results in a home garage setup.
One last fact before we dive in:
Most of the dust that lands in wet paint comes from either the car or the painter—not the environment. Let’s fix that.
TL;DR – Quick Summary
Every paint job gets some dust—but you can dramatically reduce it with the right prep and setup.
This guide busts common myths and lays out what actually works for DIY auto painters:
- Start with clean: Degrease and wash everything.
- Control the air: Filter and dry your compressed air with multi-stage systems and appropriate moisture control for your climate.
- Manage the space: Use simple barriers (plastic or other) to block off your work area and help control overspray.
- Move the air: Use fans for positive pressure or venting (try to arrange both inlet and outlet fans)—but avoid hurricane-force wind tunnels.
- Ground the car: Static electricity is real—clip your project to a real ground (concrete is not a good ground).
- Dress the part: You’re one of the biggest dust sources—wear a proper paint suit for dust control and your health.
- Use the right materials: Quality masking paper, Corona-coated automotive grade plastic, proper tape, and real auto wipes make a difference. Home Depot and Lowe’s are great for latex jobs around the house—not your car.
- Skip the gimmicks: Water-on-the-floor creates more problems than it solves. Chain-over-the-axle is an old shop myth and does nothing.
You don’t need a $30,000 spray booth—you just need a clean, controlled space and smart habits.
Top Myths About Dust Control
Myth: Wetting the floor helps control dust.
Not really—it just makes a mess. And if your floor is dirty to begin with, water only stirs things up. In hot, humid regions, the evaporating water can raise humidity even more—affecting the curing process, especially with catalyzed urethane products.
Myth: Draping a chain from the axle to the floor reduces static.
Not in a meaningful way. It’s an old shop myth with little real-world effect. Here is why:
-
- No reliable electrical path: Most axles are painted or coated, meaning the chain isn’t actually making a metal-to-metal connection.
- Concrete isn’t a good ground: It holds moisture and is mildly conductive, but it’s no substitute for a true earth ground. Just laying a chain on the shop floor won’t discharge static.
(More on what actually works in the “Magic” section below.)
Myth: You need a dedicated paint booth with ventilation and filters.
Reality: Helpful, yes. Necessary, no.
Plenty of high-end garage jobs have been done without a full booth. In fact, many DIY painters get excellent results spraying in a well-prepped garage—or even outdoors, with a little planning.
The real purpose of a booth—whether pro-grade, home-built, or just a simple plastic-sheeting setup—is to manage overspray: keep it off everything you don’t want painted, and move it out of the work area in a controlled way. That’s it.
Keep it simple. Use fans wisely. Create a clean, contained zone and exhaust the air somewhere safe. You don’t need a $10,000 setup—but you do need a plan.
(Look for a full article on setting up a simple DIY paint space—coming soon to Notes from the Shop.)
Myth: All paint booths need explosion-proof fans and lights.
The Facts:
Yes, solvent fumes are flammable—but they’re not a hair-trigger bomb.
-
- Urethane, lacquer, and enamel vapors do have a flash point, but you need just the right air/fuel ratio and an ignition source for anything to go boom.
- Most garages never reach those vapor concentrations—especially with even basic ventilation.
- Thousands of DIYers paint safely in garages every year—even with gas water heaters, propane burners, or woodstoves running.
- Explosion-proof requirements exist for liability and regulation—not because DIYers are blowing themselves up.
OSHA, NFPA, and insurance carriers require explosion-proof gear in commercial shops to protect employees and avoid lawsuits. Your home garage isn’t under those rules—but use your head. Keep fumes moving, avoid open flames, and don’t spray next to an arc welder. That’s just common sense.
Myth: Home Depot or Lowe’s masking supplies are fine.
Reality: They’re cheap—but they’re not fine.
Hardware store tape can lift paint or leave residue. Their masking paper may shed fibers. Generic plastic sheeting isn’t designed for automotive refinishing—automotive-grade plastic is corona-treated on one side so overspray sticks instead of flaking off. Without it, you risk static buildup and a shower of dried paint flecks as soon as the plastic is disturbed.
Use products made for the job. You’ll thank yourself later.
Click HERE for links to some suggested products
Myth: You can paint in any weather—just tweak the mix.
Reality: Nope. You can’t just “reducer” your way out of bad conditions.
High humidity, big temperature swings, or excessive wind will mess with your results—no matter what “magic mix” you try. Every paint manufacturer provides a Tech Data Sheet (TDS) with exact instructions for reducer speed, catalyst ratio, flash time, and ideal weather windows.
There are hundreds of forum and Facebook threads where someone asks, “Can I spray in [insert bad idea here] conditions?” and someone always replies: “Did you read the TDS?”
Don’t be that guy. Read the TDS. Know your limits. This is DIY—it’s supposed to be fun. But sanding off $1,000 worth of paint because of bad timing? Not fun.
Be patient. Wait for the right conditions. Give your work the best shot at a great result.
The Magic: What Actually Works
Wash the Car Like It’s Getting Ready for a Show
If you want clean paint, you need a clean surface. And not just “looks good from across the garage” clean—we’re talking deep clean. Dirt hides in seams, under trim, inside wheel wells, and door jambs. If it can settle there, it will launch into your paint the moment you trigger your gun.
Here’s what works:
-
- Use dish soap and water. Original blue Dawn is a favorite—it cuts through wax, grease, and residue without any fancy additives or scents.
- For serious grime or oily residue, grab the Zep Purple Degreaser, Simple Green, or your favorite heavy-duty cleaner.
- Scrub everything—door jambs, rocker panels, wheel wells, inside the trunk lip, under the hood, even the underside of the doors. If you skip it, it’ll bite you.
- Once you’ve washed it, blow it down with an air nozzle. Use more air volume and velocity than your paint gun puts out. Hit every crack and crevice—from every angle. Then do it again.
That “little bit of dust” you ignore during prep can turn into a giant regret in the middle of your final coat.
Clean Everything Around the Spray Zone
You can wash the car to perfection—but if your wheel blocks, rotisserie, jack stands, or even your air hose are filthy, you’re just setting a dust trap.
Here’s what to do:
-
- Wipe down and blow off everything in the spray area: stands, dollies, jacks, ramps, the rotisserie, even the hoses and cords that will be nearby or moving around.
- Don’t forget what’s underneath—dust bounces off the floor, rolls off ramps, and hides on the underside of just about everything.
- A nozzle on your air hose is great for high-pressure blasts into tight spaces. A leaf blower works wonders for moving larger amounts of dust and debris across the floor or out of the garage entirely.
Pro tip: Blow down the car with your air nozzle. Then blow down the floor with the leaf blower. Repeat until there’s nothing left to move.
Blow Down and Mop the Shop—and Give It Time to Settle and Dry
Once the car, parts and equipment are cleaned, it’s time to clean the shop itself. Not just tidy—deep clean.
-
- Use a leaf blower to flush out the entire garage or booth area.
- Open all doors and windows, set up a few box fans or floor fans, and get the air moving. You’re not just kicking up dust—you’re evacuating it.
- Mop the floor after blowing out, using a traditional wringer bucket and clean water.
- Let the shop sit. Dust can linger in the air for hours. Overnight is best.
Bottom line: If it moves during cleaning—it’ll move when you’re painting. Get it gone.
Click HERE for links to some of the cleaning products discussed
Ground the Car to Reduce Static
Static electricity attracts dust like a magnet. Especially in dry climates, it builds up on metal surfaces—and airflow from a spray gun increases the charge.
How to do it:
-
- Tap into a ground wire from a 3-prong outlet (if you have some electrical skills) or use a grounded piece of equipment like a compressor or welder.
- Make a grounding wire with standard wire or MIG wire and alligator clips.
- Clip to bare metal—body bolts, brake lines, or clean frame.
Any wire will work—but the connection must be real, and both ends must touch clean, bare, conductive metal.
You can also use anti-static tools like ionizing blowers, grounded spray stands, or static-neutralizing wipes. But a true ground is your best solution.
Filter and Dry Your Air Supply Properly
Moisture—and oil—in your air lines will silently destroy a paint job. Even invisible contaminants can cause fisheyes, blushing, or poor adhesion.
The Hidden Threat: Compressor Oil
-
- Some compressors can generate oil mist from crankcase blowby.
- Use a proper coalescing filter rated for paint work.
- Never paint with a hose that’s been connected directly to the compressor—dedicate a clean hose for painting only.
How to Test for Moisture:
-
-
- Mirror or Chrome Test: Blow air onto a clean mirror or chrome surface. Fog or droplets = moisture.
- Paper Towel Test: Spray onto a clean white towel. Damp spots = problem.
- Clear Cup Test: Blow into an upside-down plastic cup. Fog = moisture in the line.
- Fittings Check: Moisture around disconnects or regulators means your system has moisture in the lines.
-
Relative Humidity vs. Dew Point:
-
- RH on your weather app is irrelevant.
- Dew point tells you how much water is in the air—check it—this may be why you have moisture in your air and it needs to be dealt with.
What You Actually Need:
-
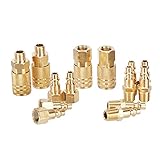
- At minimum: 50′ of sloped airline, moisture drops, coalescing filter, regulator at hose end, clean hose.
- In low to medium humidity climates: a dessicant canister may be fine.
- In humid climates: you may need a refrigerated dryer. Drain tank daily, use trap valves.
You don’t need a $3,000 setup—just clean, dry air.
Click HERE for links some suggested Air Equipment
We’ll have a full breakdown soon in a future article:
“Clean, Dry Air: How to Build a DIY Air and Filtration System That Works.”
Suit Up: Protect the Paint—and Yourself
You are a major source of dust. Skin, clothes, and shoes shed debris—and attract overspray.
Fun fact: 60–70% of typical household dust comes from skin cells and fabric fibers. Check your dryer lint trap. Do you want that floating around your paint?
-
- Wear a full paint suit with hood and sleeves
- Use clean gloves and dedicated footwear or booties
It’s About More Than Dust—It’s About Safety
-
- Urethanes contain isocyanates—dangerous toxins—which are absorbed through the skin and eyes
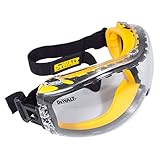
- Wear a respirator or fresh-air system, sealed goggles, and full skin coverage
Click HERE for links to some suggested PPE
Pick the Right Day: Weather Matters
Don’t paint on windy days. Wind causes turbulence in the spray area and blows trash into your paint. If the weather’s against you—wait.
A Word on Fans and Airflow
Fans work best when it’s relatively still outside. They help—but they can’t fight the wind.
Control the Bugs: They’re Not Just Annoying—They’re Paint Killers
If you live in a buggy area—or it’s the wrong season—you need to think like an insect… and outsmart them.
It’s a real thing: some bugs seem to like fresh paint. Maybe it’s the smell, the warmth, or just bad luck—but there’s nothing quite like the horror of standing back to admire the glass you just laid down…and watching Mr. Skeeter dive-bomb straight into it.
And let’s be clear: he ain’t buffing out.
What to Do About It
-
- Set up bug zappers or bright lights well away from the paint zone. The goal is to divert and attract, not invite them in.
- Turn off overhead lights in the booth or garage until you’re ready to spray. Bugs love light. Don’t give them a reason to hang out.
- Seal off your space as much as practical. A few well-placed barriers can go a long way.
- If you’re painting outside, spray earlier in the day—before peak bug activity ramps up.
Use the Right Wipes: No Microfiber, Shop Rags, or Paper Towels
You’re down to the final prep, wiping down the car before paint.
Don’t blow it now.
Microfiber towels? Great for polishing.
Shop rags? Great for wiping grease.
Paper towels? Even the blue “shop towels.” Great for blowing lint into the air.
But for final wipe-downs? They’re all dust bombs and sources of potential contamination.
Use dedicated automotive-grade prep wipes and quality wax and grease remover. These are lint-free, designed for solvent compatibility, and won’t leave residue or microscopic fuzz in your paint.
Tack Like a Pro: One Last Pass, Done Right
Tack cloths aren’t magic—but they’re also not all created equal.
Use a quality automotive tack cloth, and use it at the very last possible moment—when you’re fully suited up and ready to spray.
Don’t reuse an old one. Don’t cheap out with bargain-bin versions.
And never drag it across the surface like you’re buffing—ball it up lightly and then wipe, turning and re-balling it frequently. light touch only – this project car is your baby, tack it that way.
Hang It Vertical
Whenever possible, consider hanging panels vertically—dust settles on flat surfaces faster than vertical ones.
-
- Use strong wire and secure mounting points. Anchor it so it doesn’t move or spin around when spraying.
Understand Overspray
Some “dust” is dried paint overspray flecks that fell back onto the car. It happens when reducers are too fast, flash times are rushed, or air is too dry, too humid, or turbulent.
-
- Match reducer to temperature
- Use calm, balanced airflow
Think Like a Surgeon: Don’t Track Dirt into the Booth
You’ve cleaned the floor. Washed the car. Filtered the air.
Then you step out of the spray area—and walk right back in with a dusty paint suit or shoes.
Treat your spray zone like a surgical suite:
-
- If you leave the area to mix paint, go to the bathroom, or answer the phone—remove your suit and booties first.
- Don’t lean on dusty surfaces, sit in your favorite chair or brush up against shop gear and then step back into the booth.
You spent hours cleaning. Don’t undo it in 30 seconds
Ventilate Gently
Too much air stirs up trash. Too little and overspray/fumes build up. You want calm, directional airflow—in one side, out the other. Inlet filters can help but aren’t always needed, depending on your overall environment. Furnace filters work just fine for temporary home setups. Exhaust filters may be appropriate if you have close neighbors or otherwise need to control what is leaving the shop.
Setting up fans for a slightly “positive” booth pressure (which simply means more air coming in than being sucked out) can be helpful. Negative booth pressure (more air being sucked out than is being blown in) can cause air to enter the spray space from “all the wrong places,” bringing in dust and other contaminants.
Keep it simple. Gentle wins.
Final Thoughts:
Getting a clean, show-quality paint job at home is absolutely possible. You don’t need a high dollar booth, elaborate gear, or a sterile lab environment. What you need is a clean workspace, quality materials, good habits, and a solid understanding of what actually matters.
Forget the gimmicks. Focus on what works. Prep like a pro, keep your spray zone clean, use the right materials—and respect the process. The difference between frustration and fantastic results often comes down to the little things: patience, airflow, and cleanliness.
So keep it simple. Be smart. And most of all—have fun. Because few things are more satisfying than stepping back, looking at your work, and realizing you nailed it.
You’ve got this.
For anyone tackling automotive paint at home, one of the biggest challenges is keeping dust out of your paint—and overspray off everything else. It’s a topic that comes up constantly in forums and Facebook groups—for good reason. There’s a lot of conflicting advice out there. Some of it’s helpful, some of it’s outdated, and some is just flat-out wrong.
This article pulls together the Best-Known Methods from hundreds of conversations with experienced painters—both pros and serious hobbyists—who have been there, done that, and are getting great results. And a special thanks to the group on the SPI Forum – the best source of paint/body information on the web.
We’ll start by busting some common myths, then dig into what actually works—the real “magic”—and why it matters.
I know some folks will disagree—rock on! I’m just sharing what’s worked for me.
A Quick Reality Check
Every single paint job has dust in it.
Even brand-new cars, painted by robots in multimillion-dollar booths, aren’t immune.
At SEMA 2023, I asked a rep from a major sandpaper company about the small rolls of finishing-grit discs (about 1.5 inches across) on their table. He told me they’re sold mainly to auto manufacturers like Honda, Toyota, and GM—because new cars average 25–30 dust nibs that have to be cut and buffed out. These are factory paint jobs in the most tightly controlled conditions possible—conditions no home setup can replicate.
That said, there are practical, affordable things you can do to dramatically reduce dust and get exceptional results in a home garage setup.
One last fact before we dive in:
Most of the dust that lands in wet paint comes from either the car or the painter—not the environment. Let’s fix that.
TL;DR – Quick Summary
Every paint job gets some dust—but you can dramatically reduce it with the right prep and setup.
This guide busts common myths and lays out what actually works for DIY auto painters:
- Start with clean: Degrease and wash everything.
- Control the air: Filter and dry your compressed air with multi-stage systems and appropriate moisture control for your climate.
- Manage the space: Use simple barriers (plastic or other) to block off your work area and help control overspray.
- Move the air: Use fans for positive pressure or venting (try to arrange both inlet and outlet fans)—but avoid hurricane-force wind tunnels.
- Ground the car: Static electricity is real—clip your project to a real ground (concrete is not a good ground).
- Dress the part: You’re one of the biggest dust sources—wear a proper paint suit for dust control and your health.
- Use the right materials: Quality masking paper, Corona-coated automotive grade plastic, proper tape, and real auto wipes make a difference. Home Depot and Lowe’s are great for latex jobs around the house—not your car.
- Skip the gimmicks: Water-on-the-floor creates more problems than it solves. Chain-over-the-axle is an old shop myth and does nothing.
You don’t need a $30,000 spray booth—you just need a clean, controlled space and smart habits.
Top Myths About Dust Control
Myth: Wetting the floor helps control dust.
Not really—it just makes a mess. And if your floor is dirty to begin with, water only stirs things up. In hot, humid regions, the evaporating water can raise humidity even more—affecting the curing process, especially with catalyzed urethane products.
Myth: Draping a chain from the axle to the floor reduces static.
Not in a meaningful way. It’s an old shop myth with little real-world effect.
-
- No reliable electrical path: Most axles are painted or coated, meaning the chain isn’t actually making a metal-to-metal connection.
- Concrete isn’t a good ground: It holds moisture and is mildly conductive, but it’s no substitute for a true earth ground. Just laying a chain on the shop floor won’t discharge static.
(More on what actually works in the “Magic” section below.)
Myth: You need a dedicated paint booth with ventilation and filters.
Reality: Helpful, yes. Necessary, no.
Plenty of high-end garage jobs have been done without a full booth. In fact, many DIY painters get excellent results spraying in a well-prepped garage—or even outdoors, with a little planning.
The real purpose of a booth—whether pro-grade, home-built, or just a simple plastic-sheeting setup—is to manage overspray: keep it off everything you don’t want painted, and move it out of the work area in a controlled way. That’s it.
Keep it simple. Use fans wisely. Create a clean, contained zone and exhaust the air somewhere safe. You don’t need a $10,000 setup—but you do need a plan.
(Look for a full article on setting up a simple DIY paint space—coming soon to Notes from the Shop.)
Myth: All paint booths need explosion-proof fans and lights.
The Facts:
Yes, solvent fumes are flammable—but they’re not a hair-trigger bomb.
-
- Urethane, lacquer, and enamel vapors do have a flash point, but you need just the right air/fuel ratio and an ignition source for anything to go boom.
- Most garages never reach those vapor concentrations—especially with even basic ventilation.
- Thousands of DIYers paint safely in garages every year—even with gas water heaters, propane burners, or woodstoves running.
- Explosion-proof requirements exist for liability and regulation—not because DIYers are blowing themselves up.
OSHA, NFPA, and insurance carriers require explosion-proof gear in commercial shops to protect employees and avoid lawsuits. Your home garage isn’t under those rules—but use your head. Keep fumes moving, avoid open flames, and don’t spray next to an arc welder. That’s just common sense.
Myth: Home Depot or Lowe’s masking supplies are fine.
Reality: They’re cheap—but they’re not fine.
Hardware store tape can lift paint or leave residue. Their masking paper may shed fibers. Generic plastic sheeting isn’t designed for automotive refinishing—automotive-grade plastic is corona-treated on one side so overspray sticks instead of flaking off. Without it, you risk static buildup and a shower of dried paint flecks as soon as the plastic is disturbed.
Use products made for the job. You’ll thank yourself later.
Click HERE for links to some suggested products
Myth: You can paint in any weather—just tweak the mix.
Reality: Nope. You can’t just “reducer” your way out of bad conditions.
High humidity, big temperature swings, or excessive wind will mess with your results—no matter what “magic mix” you try. Every paint manufacturer provides a Tech Data Sheet (TDS) with exact instructions for reducer speed, catalyst ratio, flash time, and ideal weather windows.
There are hundreds of forum and Facebook threads where someone asks, “Can I spray in [insert bad idea here] conditions?” and someone always replies: “Did you read the TDS?”
Don’t be that guy. Read the TDS. Know your limits. This is DIY—it’s supposed to be fun. But sanding off $1,000 worth of paint because of bad timing? Not fun.
Be patient. Wait for the right conditions. Give your work the best shot at a great result.
The Magic: What Actually Works
Wash the Car Like It’s Getting Ready for a Show
If you want clean paint, you need a clean surface. And not just “looks good from across the garage” clean—we’re talking deep clean. Dirt hides in seams, under trim, inside wheel wells, and door jambs. If it can settle there, it will launch into your paint the moment you trigger your gun.
Here’s what works:
-
- Use dish soap and water. Original blue Dawn is a favorite—it cuts through wax, grease, and residue without any fancy additives or scents.
- For serious grime or oily residue, grab the Zep Purple Degreaser, Simple Green, or your favorite heavy-duty cleaner.
- Scrub everything—door jambs, rocker panels, wheel wells, inside the trunk lip, under the hood, even the underside of the doors. If you skip it, it’ll bite you.
- Once you’ve washed it, blow it down with an air nozzle. Use more air volume and velocity than your paint gun puts out. Hit every crack and crevice—from every angle. Then do it again.
That “little bit of dust” you ignore during prep can turn into a giant regret in the middle of your final coat.
Clean Everything Around the Spray Zone
You can wash the car to perfection—but if your wheel blocks, rotisserie, jack stands, or even your air hose are filthy, you’re just setting a dust trap.
Here’s what to do:
-
- Wipe down and blow off everything in the spray area: stands, dollies, jacks, ramps, the rotisserie, even the hoses and cords that will be nearby or moving around.
- Don’t forget what’s underneath—dust bounces off the floor, rolls off ramps, and hides on the underside of just about everything.
- A nozzle on your air hose is great for high-pressure blasts into tight spaces. A leaf blower works wonders for moving larger amounts of dust and debris across the floor or out of the garage entirely.
Pro tip: Blow down the car with your air nozzle. Then blow down the floor with the leaf blower. Repeat until there’s nothing left to move.
Blow Down and Mop the Shop—and Give It Time to Settle and Dry
Once the car, parts and equipment are cleaned, it’s time to clean the shop itself. Not just tidy—deep clean.
-
- Use a leaf blower to flush out the entire garage or booth area.
- Open all doors and windows, set up a few box fans or floor fans, and get the air moving. You’re not just kicking up dust—you’re evacuating it.
- Mop the floor after blowing out, using a traditional wringer bucket and clean water.
- Let the shop sit. Dust can linger in the air for hours. Overnight is best.
Bottom line: If it moves during cleaning—it’ll move when you’re painting. Get it gone.
Click HERE for links to some of the cleaning products discussed
Ground the Car to Reduce Static
Static electricity attracts dust like a magnet. Especially in dry climates, it builds up on metal surfaces—and airflow from a spray gun increases the charge.
How to do it:
-
- Tap into a ground wire from a 3-prong outlet (if you have some electrical skills) or use a grounded piece of equipment like a compressor or welder.
- Make a grounding wire with standard wire or MIG wire and alligator clips.
- Clip to bare metal—body bolts, brake lines, or clean frame.
Any wire will work—but the connection must be real, and both ends must touch clean, bare, conductive metal.
You can also use anti-static tools like ionizing blowers, grounded spray stands, or static-neutralizing wipes. But a true ground is your best solution.
Filter and Dry Your Air Supply Properly
Moisture—and oil—in your air lines will silently destroy a paint job. Even invisible contaminants can cause fisheyes, blushing, or poor adhesion.
The Hidden Threat: Compressor Oil
-
- Some compressors can generate oil mist from crankcase blowby.
- Use a proper coalescing filter rated for paint work.
- Never paint with a hose that’s been connected directly to the compressor—dedicate a clean hose for painting only.
How to Test for Moisture:
-
-
- Mirror or Chrome Test: Blow air onto a clean mirror or chrome surface. Fog or droplets = moisture.
- Paper Towel Test: Spray onto a clean white towel. Damp spots = problem.
- Clear Cup Test: Blow into an upside-down plastic cup. Fog = moisture in the line.
- Fittings Check: Moisture around disconnects or regulators means your system has moisture in the lines.
Even minor moisture or oil will ruin your finish. Don’t guess—test. Resolve moisture before painting.
-
Relative Humidity vs. Dew Point:
-
- RH on your weather app is irrelevant.
- Dew point tells you how much water is in the air—check it—this may be why you have moisture in your air and it needs to be dealt with.
What You Actually Need:
-
- At minimum: 50′ of sloped airline, moisture drops, coalescing filter, regulator at hose end, clean hose.
- In humid climates: you may need a refrigerated dryer. Drain tank daily, use trap valves.
You don’t need a $3,000 setup—just clean, dry air.
Click HERE for links some suggested Air Equipment
We’ll have a full breakdown soon in a future article:
“Clean, Dry Air: How to Build a DIY Air and Filtration System That Works.”
Suit Up: Protect the Paint—and Yourself
You are a major source of dust. Skin, clothes, and shoes shed debris—and attract overspray.
Fun fact: 60–70% of typical household dust comes from skin cells and fabric fibers. Check your dryer lint trap. Do you want that floating around your paint?
-
- Wear a full paint suit with hood and sleeves
- Use clean gloves and dedicated footwear or booties
It’s About More Than Dust—It’s About Safety
-
- Urethanes contain isocyanates—dangerous toxins—which are absorbed through the skin and eyes
- Wear a respirator or fresh-air system, sealed goggles, and full skin coverage
Click HERE for links to some suggested PPE
Pick the Right Day: Weather Matters
Don’t paint on windy days. Wind causes turbulence in the spray area and blows trash into your paint. If the weather’s against you—wait.
A Word on Fans and Airflow
Fans work best when it’s relatively still outside. They help—but they can’t fight the wind.
Control the Bugs: They’re Not Just Annoying—They’re Paint Killers
If you live in a buggy area—or it’s the wrong season—you need to think like an insect… and outsmart them.
It’s a real thing: some bugs seem to like fresh paint. Maybe it’s the smell, the warmth, or just bad luck—but there’s nothing quite like the horror of standing back to admire the glass you just laid down…and watching Mr. Skeeter dive-bomb straight into it.
And let’s be clear: he ain’t buffing out.
What to Do About It
-
- Set up bug zappers or bright lights well away from the paint zone. The goal is to divert and attract, not invite them in.
- Turn off overhead lights in the booth or garage until you’re ready to spray. Bugs love light. Don’t give them a reason to hang out.
- Seal off your space as much as practical. A few well-placed barriers can go a long way.
- If you’re painting outside, spray earlier in the day—before peak bug activity ramps up.
Use the Right Wipes: No Microfiber, Shop Rags, or Paper Towels
You’re down to the final prep, wiping down the car before paint.
Don’t blow it now.
Microfiber towels? Great for polishing.
Shop rags? Great for wiping grease.
Paper towels? Even the blue “shop towels.” Great for blowing lint into the air.
But for final wipe-downs? They’re all dust bombs and sources of potential contamination.
Use dedicated automotive-grade prep wipes and quality wax and grease remover. These are lint-free, designed for solvent compatibility, and won’t leave residue or microscopic fuzz in your paint.
Tack Like a Pro: One Last Pass, Done Right
Tack cloths aren’t magic—but they’re also not all created equal.
Use a quality automotive tack cloth, and use it at the very last possible moment—when you’re fully suited up and ready to spray.
Don’t reuse an old one. Don’t cheap out with bargain-bin versions.
And never drag it across the surface like you’re buffing—ball it up lightly and then wipe, turning and re-balling it frequently. light touch only – this project car is your baby, tack it that way.
Hang It Vertical
Whenever possible, consider hanging panels vertically—dust settles on flat surfaces faster than vertical ones.
-
- Use strong wire and secure mounting points. Anchor it so it doesn’t move or spin around when spraying.
Understand Overspray
Some “dust” is dried paint overspray flecks that fell back onto the car. It happens when reducers are too fast, flash times are rushed, or air is too dry, too humid, or turbulent.
-
- Match reducer to temperature
- Use calm, balanced airflow
Think Like a Surgeon: Don’t Track Dirt into the Booth
You’ve cleaned the floor. Washed the car. Filtered the air.
Then you step out of the spray area—and walk right back in with a dusty paint suit or shoes.
Treat your spray zone like a surgical suite:
-
- If you leave the area to mix paint, go to the bathroom, or answer the phone—remove your suit and booties first.
- Don’t lean on dusty surfaces, sit in your favorite chair or brush up against shop gear and then step back into the booth.
You spent hours cleaning. Don’t undo it in 30 seconds
Ventilate Gently
Too much air stirs up trash. Too little and overspray/fumes build up. You want calm, directional airflow—in one side, out the other. Inlet filters can help but aren’t always needed, depending on your overall environment. Furnace filters work just fine for temporary home setups. Exhaust filters may be appropriate if you have close neighbors or otherwise need to control what is leaving the shop.
Setting up fans for a slightly “positive” booth pressure (which simply means more air coming in than being sucked out) can be helpful. Negative booth pressure (more air being sucked out than is being blown in) can cause air to enter the spray space from “all the wrong places,” bringing in dust and other contaminants.
Keep it simple. Gentle wins.
Final Thoughts:
Getting a clean, show-quality paint job at home is absolutely possible. You don’t need a high dollar booth, elaborate gear, or a sterile lab environment. What you need is a clean workspace, quality materials, good habits, and a solid understanding of what actually matters.
Forget the gimmicks. Focus on what works. Prep like a pro, keep your spray zone clean, use the right materials—and respect the process. The difference between frustration and fantastic results often comes down to the little things: patience, airflow, and cleanliness.
So keep it simple. Be smart. And most of all—have fun. Because few things are more satisfying than stepping back, looking at your work, and realizing you nailed it.
You’ve got this.
Links to products discussed – and a few other ideas
Cleaning Products:


Masking Tape, Paper and Prep:


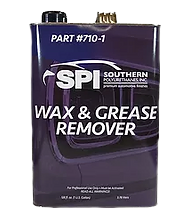
Southern Polyurethane Wax and Grease Remover
Personal Protective Equipment:


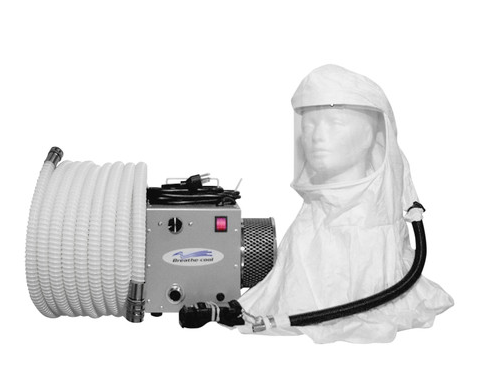
Breathecool II Supplied Air Respirator System
Air Equipment:


Other Shop Equipment: